This is an old revision of the document!
Table of Contents
Content
- Variant A
- Variant A2
- Variant B
- Variant C
- Stunprod holder
- Stunprod HUD
Features
- Mouse look stance system.
- 3 sustained strikes and miss/threaten pose.
- Strike or threaten action.
- Sparking sound & visual effect.
- Self hiding belt attachment.
- (optional) Auto-temp-attach function.
- (optional) 3rd person view Control HUD.
- (optional) Compatible with KDC Doodles & Strikes bruise engine.
A? A2? B? C?
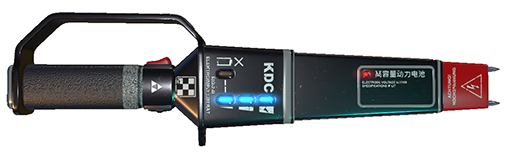
The KDC Stunprod comes in 4 variants that use a different idle stance:
- A:Held casually against the shoulder.
- A2: Held at an angle over the shoulder & behind the neck.
- B: Held at the avatar side.
- C: Same as above but with a wider gap between the arm and the hips.
If you plan to use the auto-temp-attach function, keep in mind that the stunprod holder can only house one variant at a time.
Controls
Using mouselook
While in mouselook, holding the left mouse button will begin a strike, it will be held until the capacitor is drained, or until the left mouse button is released. Aiming high, level or low will select whether the striking pose will be the high, medium or low version.
It's important to understand that the selected stance depend on your own view angle and not where you are aiming specifically.
Using the HUD
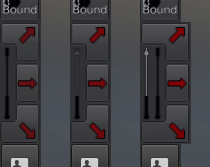 Wearing the Stunprod HUD will allow you to control the Stunprod from a 3rd person view. It will allow you to select the high/medium/low stance directly using the buttons with the red arrows on them.
Like in mouselook mode, a strike will last as long as the button is pressed, or until the capacitor is discharged.
Strike or Threaten?
The KDC Stunprod automatically detect if you where aiming at someone or not and will either perform a strike, or a “threaten” animation accordingly. Ensure that your victim is in range and that you are facing them if you want to land a hit.
The “threaten” mode doesn't “do” anything and is here for role play purpose. It will still consume the capacitor charge as the Stunprod will still emit a threatening spark.
Note: The stunprod range can vary from 1 to 5 meters based on the actual length of it, a longer stunprod will reach further.
Auto-attach setup
The Stunprod has a built-in an auto-attach feature that allows you to click the stunprod holder or the stunprod symbol on the included HUD to automatically attach/detach it from your hand without RLV and without inventory clutter.
- Wear the Stunprod crop at least once and then take it off to give it the required permissions.
- Rez the stunprod holder on the ground. (this is required because of how permissions work in SL)
- Right click/Edit the stunprod holder and drag/drop the stunprod “in-hand” variant of your choice op inside its inventory.
- Pick up and wear the stunprod holder, it is now ready to use.
Note: Equipping & unequipping the stunprod this way does not save the capacitor state. NOTE: Do not forget to replace the riding crop inside the crop holder when you receive an update